If someone’s name ends in s, an apostrophe can simply be added after their name, without adding the extra ‘s’ afterwards: Jules’ car.
The only time an apostrophe should not be used for ownership is when using the pronoun it: The house was missing its chimney. Kerry gave the dog its ball.
Apostrophes should never be used to make plurals, or for regular words ending in s. This means “Dave’s dogs” only needs that one apostrophe after Dave, and “Dave rocks” doesn’t need any.
It can get complicated, though, when one needs to follow multiple conventions at the same time.
It can get complicated when a proper noun needs to be made a plural before the possessive apostrophe is added. For example, the Johnson family live in the Johnsons’ house.
Following the same rule used for Jules’ car, the de Jesus family live in the de Jesus’ house.
If the Weatherby family own a house, it is the Weatherbys’ house. Here, the family name ends in y, but because it’s a proper noun, the plural is made by simply adding an ‘s’ instead of using the conventional -ies ending for regular nouns that end in y. The apostrophe is then added at the end.
A Quick Guide to Using an Apostrophe #punctuation #writingtips
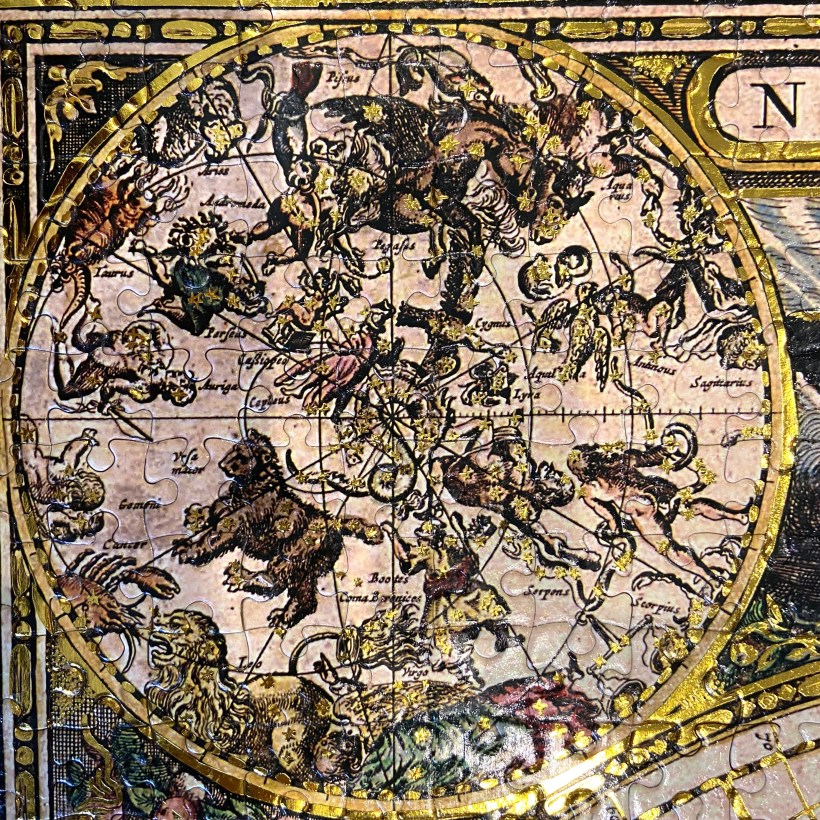
The first thing I discovered when I started researching how to prepare my memorial puzzle for framing was the amount of conflicting, and sometimes terrible, advice the internet had to offer.
Why did it all have to be so hard to find? Why couldn’t there just be one post with clear, straightforward instructions? Who even knows? I resolved then and there to write that post once I worked out what I was doing.
So, I drilled down, made notes on the approaches that seemed reasonable, and sought out some experts to guide me on the process.
On their advice, and a fair degree of holding my breath and hoping things worked as I had been told they would, this is the process I followed.
Materials:
A good solid board to mount the puzzle on. I used 2mm strawboard which I bought for about $5 at my favourite office and art supply shop. It is strong and flexible, but won’t sag or warp. It is also slightly textured, which makes it less likely that things will slide around on it.
A rolling pin.
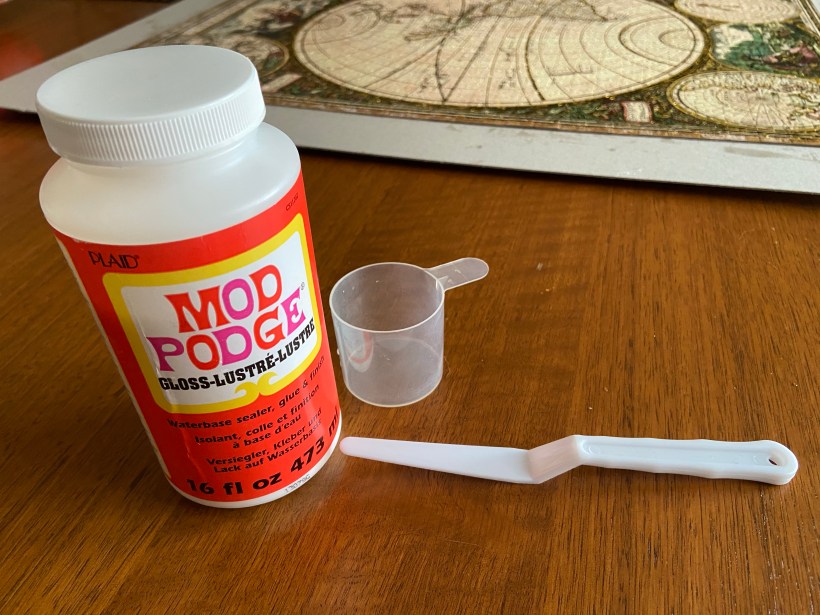
Mod Podge sealant glue. I didn’t know how much I would need, and I knew my puzzle was big, so I bought the 16oz bottle. It turned out that I only used about 2 oz of that. It’s handy stuff, so that’s okay.
A small cup to pour your glue from. This allows you to have more control over how much and where you are pouring. I used an old measure from laundry detergent.
A plastic spatula with a straight edge for spreading the glue. Some people use a credit or ATM card, but the handle on the spatula moves your hand back from the action and allows you to see right away what you’re doing.
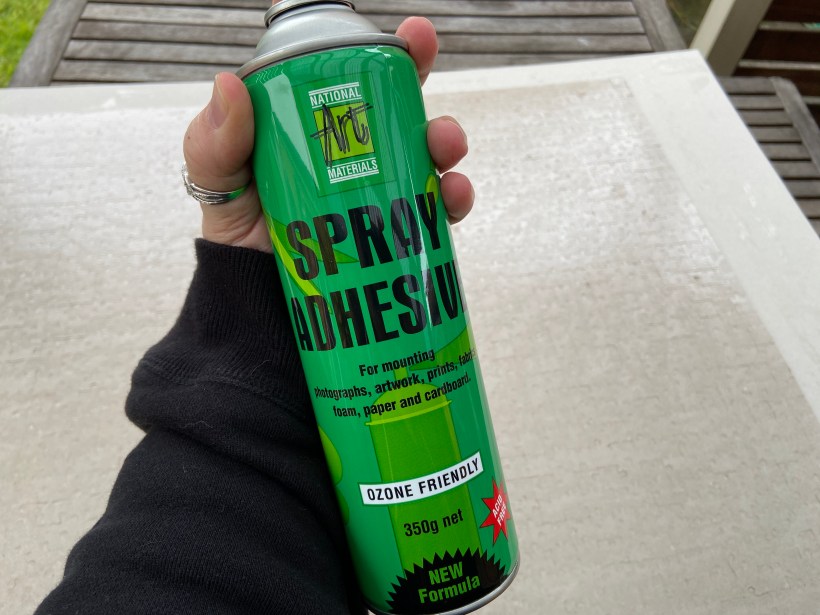
Strong spray adhesive.
Practice Makes Perfect.
Before you go anywhere near the puzzle you want to frame with your glue, practice an old puzzle so that you develop your skills and your confidence.
A friend who runs a puzzle exchange gave me an old one that nobody was interested in. Goodwill and charity shops often have loads of them for a dollar or two each. I didn’t even make the whole puzzle. I simply completed a couple of sections to practice on.
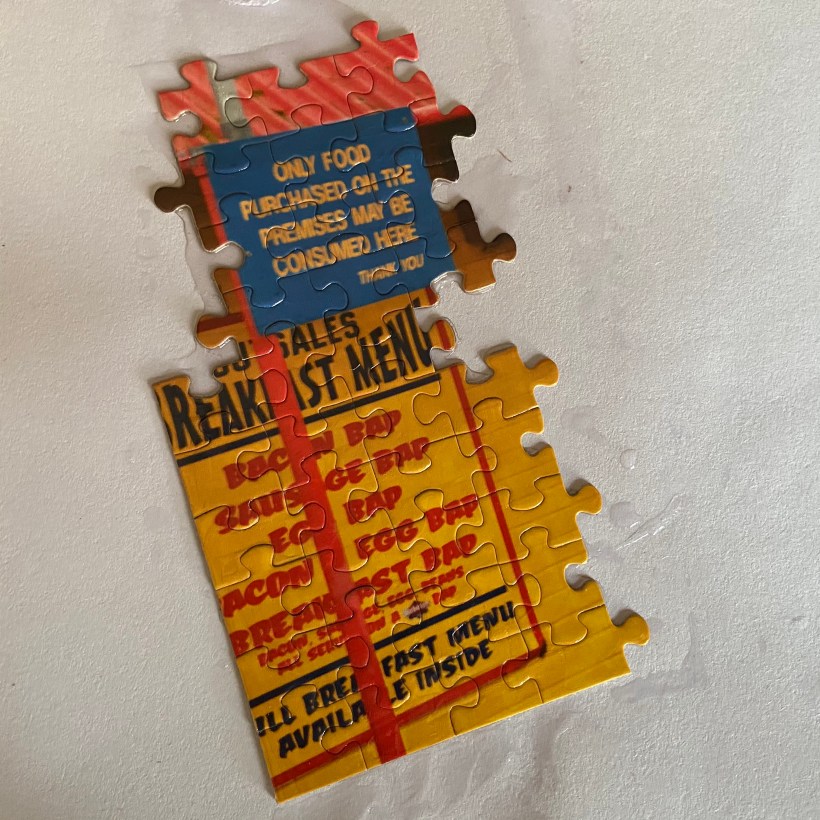
My first attempt was not bad, but I quickly discovered how easy it was to use too much glue. It spread easily, but pooled around the edges. This gave me a better idea of how much to pour on in the first instance, and how to spread it evenly. So, the edges were messy with glue, but the effect on the puzzle was good.
The first attempt involved too much glue.
The second attempt was much better.
My second attempt was much more even. It came up really well.
I braced myself, got my gear ready, and turned to my beautiful puzzle. It was time.
Gluing The Puzzle
Use your rolling pin to ensure the puzzle is completely flat and the pieces are evenly joined.
Pour some glue from the big bottle into the small cup. You can always add more if you need it.
Don’t panic that the glue is white. It WILL dry clear and glossy.
Pour the glue in a thin, even S shape line over your puzzle. Spread it thinly and evenly over the surface with the spatula.
Make sure all the joins between the pieces are filled with glue. Make sure you don’t have globs or spots of glue anywhere. The aim is to achieve an even coating over the surface.
Mine was a very large puzzle, so I did it in three sections. When one section was done, I poured more glue and kept going.
Allow it to dry for several hours. It will feel dry to touch after about 20 minutes, but it’s important to allow the glue in the joins between the pieces to cure and dry completely before you go any further.
Turn your puzzle over very gently. It may have been glued, but it’s important to be as careful as you can with it at every step of all times, as it is still fragile.
Repeat the gluing process on the back of your puzzle. This will both strengthen the bond between the pieces and seal the surface.
Wait at least 12 hours to ensure that everything is completely dry.
Cover the back of your puzzle evenly with spray adhesive, then cover the surface of your mounting board.
Wait a few minutes for the surface to become tacky to touch. then flip your puzzle very carefully onto the board.
Do this outside or in a well-ventilated area, and wear a mask. Remember, you don’t want spray adhesive all over your furniture OR in your lungs!
Use a rolling pin to ensure the entire surface of your puzzle is pressed onto the board.
Leave it alone to set and dry. Your puzzle will be ready for framing tomorrow.
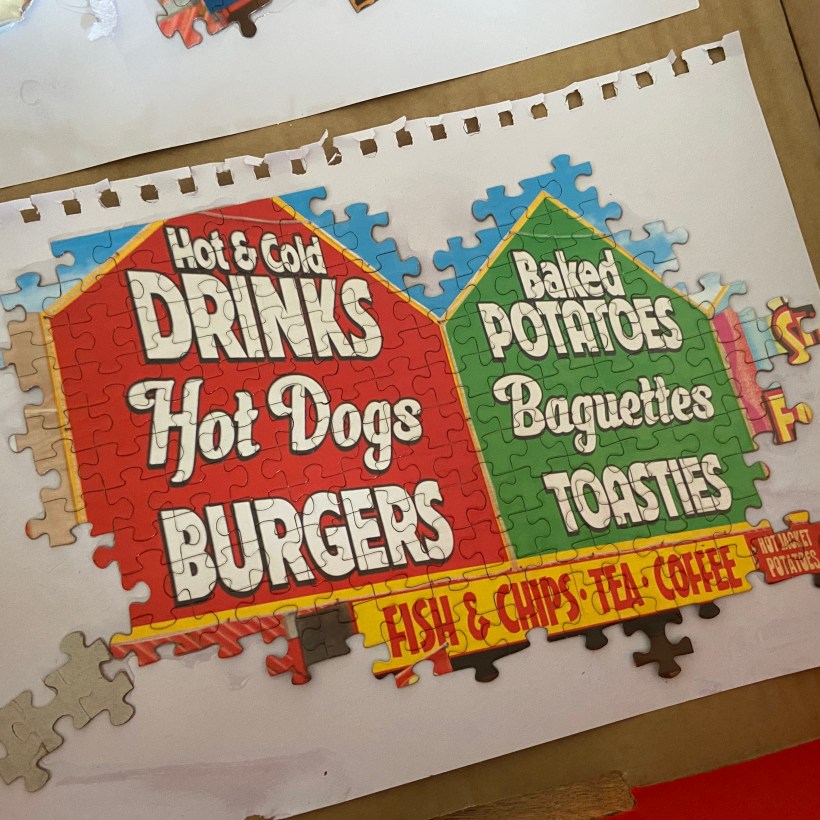
The Result:
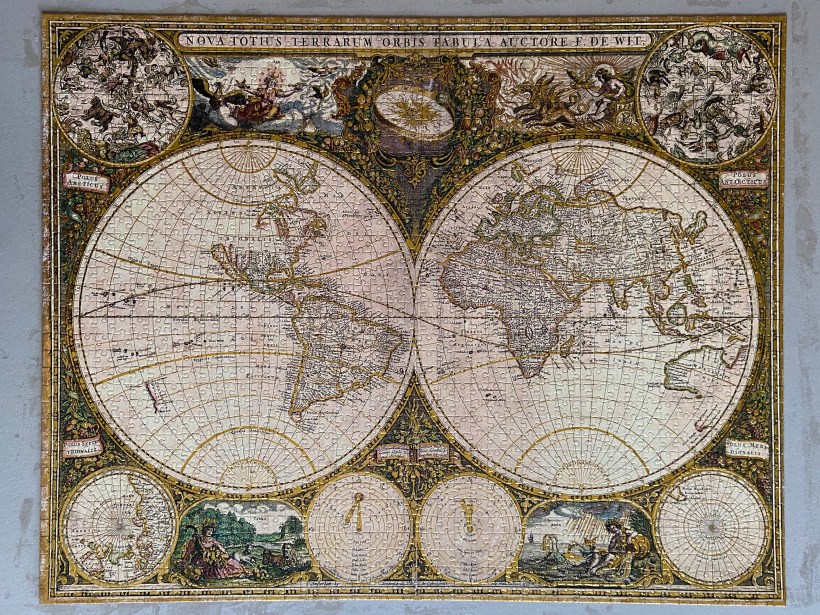
I’m really pleased with how my puzzle turned out. The finish is beautiful, and the gloss of the glue really highlights the gold highlights and subtle colours in the puzzle.
Because my puzzle is a very special one, and because it is too big for any of the commercially available frames I have seen, I’m going to take it to a professional picture framer.
Knowing whether to use ‘practice’ or ‘practise’ can be tricky. Because these words are homophones, and the spelling is very similar, it is easy to make mistakes.
Practice is the noun: I need more practice. Practice is key to being a good pianist.
Practise is the verb: I must practise if I’m going to get this right. I used to practise on the piano for an hour every day.
There is one easy way to remember which is which: these words follow the same spelling rule as ‘advice’ and ‘advise’.
Advice is a thing you give or receive. Advise is something you do. Because that pair of words don’t sound the same, it’s easy to remember which is which.
You can also think of the ending – ‘ice’ – which we know is a thing, and that reminds us which one of the pair is the noun.
Fun fact: In British and Australian English, ‘licence’ and ‘license’ follow the same rule. I have my driver’s licence. I am licensed to drive.
However, American English spells both the noun and the verb as license.
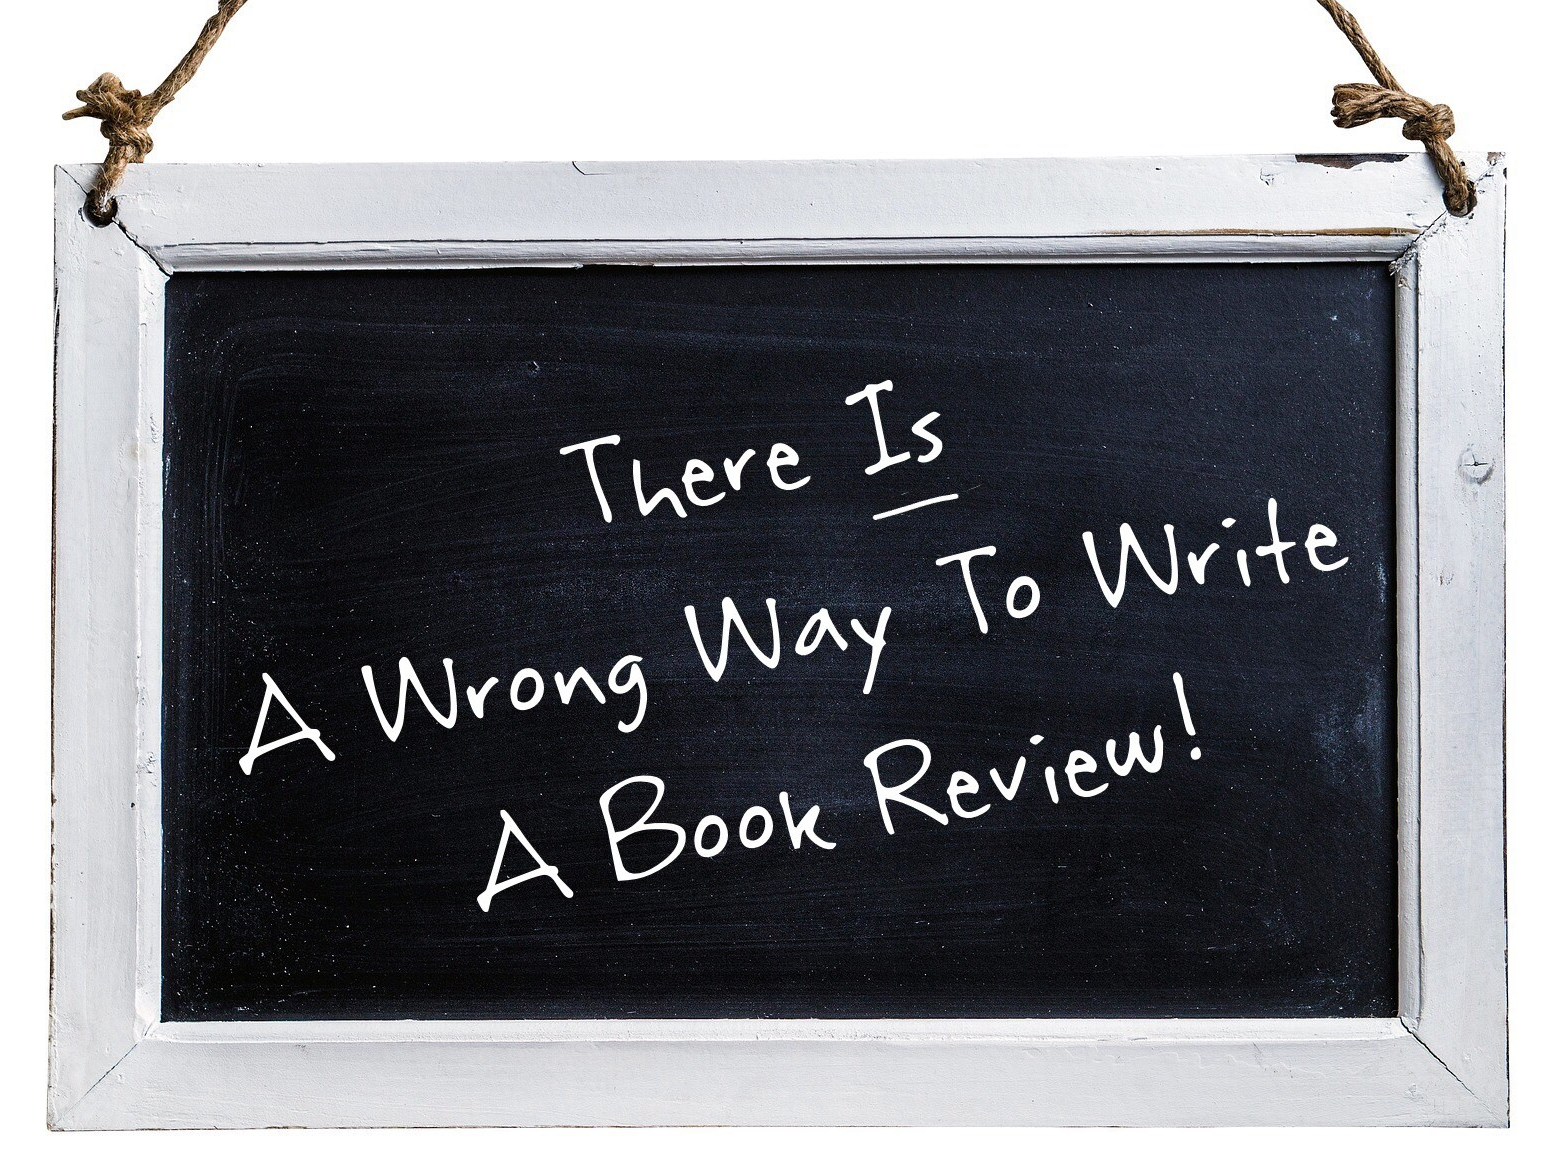
This week I read a blog post that asserted there is no right or wrong way to write a book review. The writer made some good points, particularly about reviews needing to be individual and personal responses to a book, but I disagree with the basic premise of the article.
I am writing this post from the perspective of a reader, not an author, and I realise that some people won’t agree with me, so let me explain my reasons.
A book review should never recount the story of the book. It shouldn’t give spoilers. Yet time after time, I see reviews that do exactly that. My issue is that if I already know what is going to happen, I feel as though I no longer need to read the book. The joy of the journey has been neutralised. That review has effectively cost the author a sale.
In all honesty, I hate blurbs that do this, too. As a reader, that’s one of the quickest turnoffs when I’m looking at a book.
Don’t give me a summary. Give me teasers, give me feelings, give me thoughts and observations. Pique my interest. Make me want to read it for myself, instead of making me feel as though I already have.
A good review doesn’t have to be long or complicated. It does needs to be at least 20 words in length, which gives you room to say whether you enjoyed the book and why. One or two sentences will do the trick. There is no obligation to write any more than that if you don’t want to.
If you do want to write more, you can consider including the following ideas:
Why you liked or disliked it. Remember that others may like what you disliked, and vice versa, so try to be kind.
What important ideas the story made you think about – love, anger, justice, revenge, pain, fear, overcoming… anything that is relevant to you is a valid point for comment.
What the characters are like as people, and what we learn from them Did the writer’s style impress you in any particular way?
Was it easy to read and understand, or did you have to really work at it?
Who else might like to read it? Think about interests, age group, and genres here.
This will help you to write a review that is interesting in itself, and which will encourage the right readers to choose that particular book. In that way, you’ll help both the author and prospective readers at the same time.
With all the attention given among the Indie community to the removal of book reviews by Amazon, I’m amazed at the number of authors who still post dirty links to their books on social media. This is a rookie-level mistake that can actually do more harm than good.
A dirty link helps the algorithm at Amazon to determine if there are connections between author and reader that might suggest collusion or partiality.. Even if a review is from a verified purchase, a simple connection via a shared link can be enough to make them suspect that it’s not unbiased or from an unrelated party.
If the link used by multiple customers can be traced directly back to the author, that’s one of the reasons they will start flagging and eventually removing reviews.
The simple solution is to ensure your links are clean before you post them.
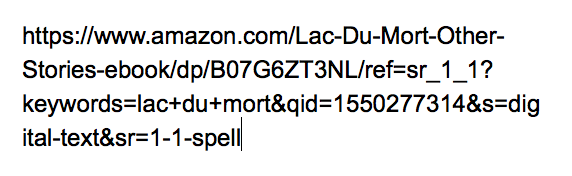
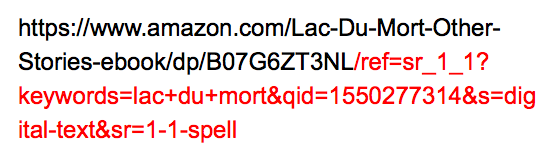
A dirty link occurs when one copies and pastes a URL without removing all the extra information that gets tacked onto it by searching for a product, copying links from a website, linking from another product, or using a bookmark created from a searched item.For example, if I search for one of my books on Google and click on the Amazon link, I get this as the URL:
This is more information than is needed to actually find my book. In the image below, I’ve denoted the “dirty” part of the link by making it red.
The highlighted part of this link is the “dirty” part. If I were to give this link to someone else to use, it tells Amazon how they got the link. All you need to post is the part of the link that directly goes to your book page. In the link above, that’s the part that is still black. Once the link identifies which display page your book has, no further information is necessary.
You can check the clean link you want to post by pasting it into a new browser window and seeing that it goes directly to your book product page. Even if you use a link shortening service like bit.ly or buff.ly, or a customised branded link, you must ensure that the links you provide are clean. Just because you and your audience don’t see the extra information on a shortened or customised link doesn’t mean it isn’t there.
That way, stores will have no reason to suspect you or your readers’ integrity, and your verified purchase reviews will remain proudly on your book page.
It should come as no surprise that when you’ve been listening to people say the same thing for a while, you get better at understanding what they really mean.
Person Z. Take, for example, a young woman who approaches her friends and family members and says something like, “Hey, so, I’m having a fancy brand-name plasticware/linenware/healthy and beauty product/accessory/clothing party at my house in a couple of weeks, and I really hope you’ll come.”
What she’s really saying: Option A: I got sucked into one of these parties by relative/friend X, and she looked so hopeful that someone would book a party so she’d get some reward, and my mouth was open before my brain could stop it.
What she’s really saying: Option B: There’s a thing this company makes, and I’d really like to have it, but it’s expensive so I’m having a party and anything you buy will help me get it cheaper.
I’ve been on both ends of the equation, and can totally sympathise. It’s fair to say I’ve smiled and nodded through a whole bunch of those evenings, and even bought a thing or three, to help friends and family members out. From time to time, I’ve also been the Option A person.
Person Y. In another example, a child approaches family members and friends and explains that the school is selling chocolates/holding a “fun run”/doing some kind of suffer-a-thon as fundraising for a new toilet block so the kids can “go” comfortably during breaks.
What the child is really saying: Option A: The school insists that I must do this thing and there’s no way out of it, so please give me some money toward it so it’s not for nothing.
What the child is really saying: Option B: There are prizes for doing this, and I really want the floppitywoppity that you can only get if you raise $5000, so please give me some money to give me a fair chance at winning one. Again, I’ve helped more than one kid out of the hole. I don’t know if any of them ever got the floppitywoppity, but I know I have helped to build more than one toilet block in my time.
Person X. Then, there’s the Indie author. Actually, it could be any Indie creative – an artist, musician, or crafter. I just decided to use an author as the example here, because that enables me to draw on my own experience again. Person X has a passion for writing, a message they want to get out to the world, and they finally get their book published. They tell their friends and family members that they have a book out, and they’re about to tell them what it’s about…
What the author is really saying: Option A: I finally fulfilled my dream. Aren’t you happy for me?
What the author is really saying: Option B: I did a thing! I may never become a millionaire, but I did a thing! Please proud of me!
What the author is really saying: Option C: Remember all those times I supported your party plan things? And your fun runs? And your kids’ school toilet blocks? And…
…But as Person X talks, there are virtual crickets chirping, and eyes looking nervously at the door, and people checking their phones, and remembering appointments they need to be at, and… What the others are really saying: Option A: Well, this is awkward… who ever thought he/she was brave enough to get out there and do the thing! What the others are really saying: Option B: Yeah, we know you’ve supported us and our kids, but we’d prefer not to mention that now, because I would rather put my cash toward fancy plastic ware/linen/clothes/beauty products/accessories or a gym membership than some book by someone nobody’s ever heard of.
What the others are really saying: Option C: What the heck are we supposed to do now? We hope he’s not going to ask us to actually read it… maybe if I don’t ask what it’s about, he’ll stop talking about it.
What the others are really saying: Option D: But… you’re my brother/sister/cousin/relative/friend… how could a book you wrote even be any good? A bit full of yourself, aren’t you?
Person W. The final example is the one person in the room who hugs you and says, “Awesome! That’s fantastic! I’ll buy your book! How much do you want for it? You’ll sign it for me, won’t you? I can’t wait to tell my friends what you’ve done!”
What they’re really saying: Option A: I’m proud of you, and I’m on your team.
What they’re really saying: Option B: I’ll probably never read it, but I’m proud of you, and I’m on your team.
What they’re really saying: Option C: “Awesome! That’s fantastic! I’ll buy your book! How much do you want for it? You’ll sign it for me, won’t you? I can’t wait to tell my friends what you’ve done!” then looking over their shoulder with a glare at the rest of the people in the room who were too selfish to do or say anything.
The moral of the story: Option A: I’m really thankful for every ‘Person W’ in my life. I had no idea when I embarked on my journey as an Indie author that it would hurt so much to know there were so many Zs and Ys in my circles, but I also had no idea how wonderful it would be to know who the Ws were, and that they were on my team.
The moral of the story: Option B: Always be a W. Even if you never read the book, be a W.
Instagram have been blocking some terms – mostly to do with sexism, sexual content, body shaming and bullying, or so I thought. It’s called a shadowban: posts using blocked tags are less visible than others, and repeated use can result in more definite blocking of posts or accounts.
Surely there’s nothing offensive about #books though? Yet it’s one of the hashtags that will cause your posts to drift into obscurity.
As an author, reader, book reviewer and all-round book nerd, that’s a trap I’ve fallen into more than once, but thankfully my love for tags like #bookstagram and #booklover has been saving my bookish hide more often than I ever realised.
I did find a rather extensive list of hashtags banned by Instagram, courtesy of the great people over at Instavast.com, but I don’t really want to go and consult another site and spend my valuable time reading through horrible words – and some of them are horrible – in order to find out if something relatively innocent is also blocked.
I’d rather be able to check quickly and easily inside the app itself. And that is quite do-able, even if you’re a novice.
Follow these handy and simple instructions to discover if a term you want to use is acceptable without consulting a long list somewhere that may even be out of date by now.
1. When you’re using the Instagram app, click on the search icon. It’s the one that looks like a magnifying glass.
2. Type in the hashtag you want to use. A list of possible tags will come up. So far, it looks like #books is okay.
3. Next, click on the Tags tab of the search window. #books is still there and still looks alright. However…
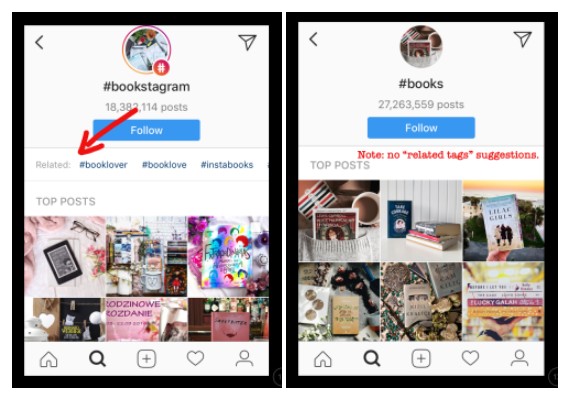
4. Tap on that tag in the list and scroll down, you will find only a few images, followed by a message that says the tag has been banned because reports have been made regarding inappropriate content.
If you go ahead and use the tag, nobody will see your tag because they can’t find posts using that tag, either. And your other tags might also end up being blocked. So might your account.
Nobody wants to end up there.
So, as authors and book lovers, we need to tag our posts differently so that other book lovers will find our posts.
When you click on a tag that is not blocked, you’ll see some further “related” tags that you could use in your posts. Notice, though, that this does not exist for #books.
I’ve slogged through a whole bunch of these “related tags” to find some great hashtags with good popularity that you can use safely – for now, anyway.
Try some of these great tags for your bookish posts:
#bookstagram
#booksofinstagram
#bookworm
#book
#booklover
#booklove
#instabooks
#booklife
#bookish
#instaread
#bookblogger
#bookaddict
#bookphoto
#booknerd
#booknerdigans
#bookstagrammer
If you’re posting images or reviews of books you’ve enjoyed, consider some of these:
#ilovereading
#epicreads
#amreading
#bibliophile
#lovetoread
#bookaddiction
#readingbooks
#readabook
#igreads
My final piece of good news is that if you have been using a blocked hashtag, you can rescue your posts and make them fully visible again.
1. For each post, click on the three dots to the right of your username.
2. Choose edit from the menu.
3. Scroll to your hashtags and change or remove the banned one.
4. Click on ‘done’ and your post will be back to full visibility.
Handy hint: if you “like” your own post once you’ve changed it, your post will re-enter the general Instagram feed.
It’s a good idea to do this one or two posts at a time, not all at once, so you don’t flood your followers’ feeds.
Even though I’ve been on Facebook for about a squillion years – I was an early adopter – I’ve only just discovered the feature called ‘Reviews’. It has been around for years, but I’ve never used it before.
Then again, I’ve not really had a page apart from my personal profile until late-ish last year when I emerged onto the world stage as a budding poet with many important things to say.
As an author, the way I’ve learned to use Facebook is entirely different than the “look at me” and “look at my selfie” way I used to drive the social media bus. These days, I don’t want people to look at me. I want them to look at my work, discover my books, and tell their friends about them, too. I want to be read, not noticed.
That’s where Facebook reviews and ratings come into the picture.
Facebook reviews and ratings help by leading potential customers to trust your brand or products.
According to Review Trackers, 71% of people say they “somewhat” or “completely” trust what they read on Facebook. At the same time, 66% of consumers regularly share feedback, thoughts and opinions on their purchases using social media.
In short – if someone likes your work enough to leave a review or rating, that’s going to be an encouragement to other people to try it for themselves.
Reviews can also help by increasing your engagement with your audience.
If a new visitor sees that you’ve responded positively to your previous visitors, that will also encourage them to trust you and your products. The more you engage with your audience, the more likely they are to become return customers.
How to add the Reviews tab to your page:
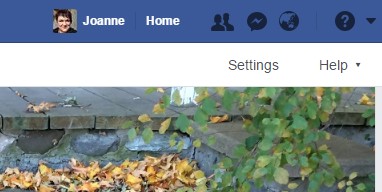
1. Navigate to your page
2. Click on ‘Settings’ at the top right-hand side.
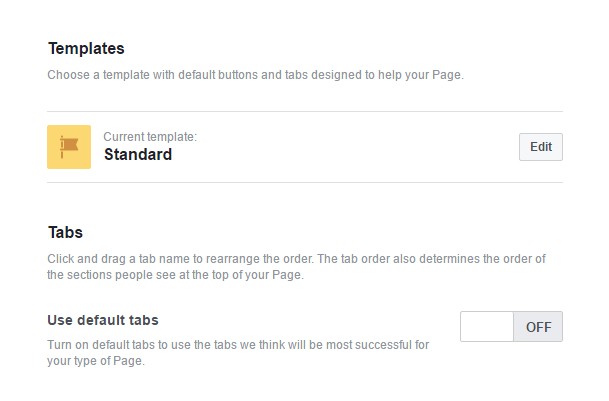
3. Click on ‘Edit page’.
4. Under Templates, scroll down to where it says ‘Add a Tab’.
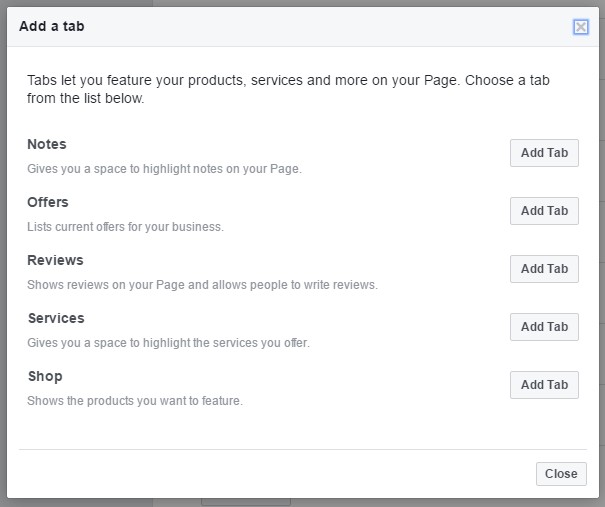
5. Click on ‘Add a tab’.
6. Click ‘Add Tab’ on ‘Reviews’, then on the ‘Close’ button.
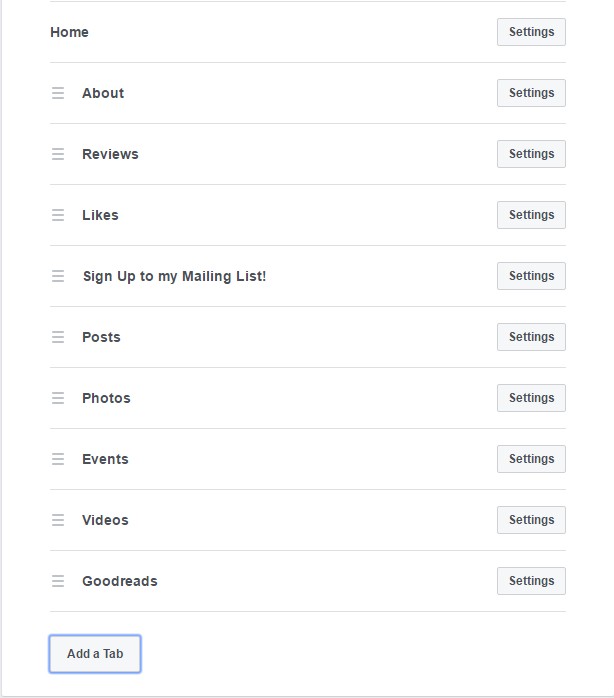
7. Rearrange your tabs by clicking on the icon that looks like three little lines next to the title of the tab and dragging up or down.
I have rearranged the tabs so that the Reviews tab is at the top, immediately under ‘About’ and above ‘Likes’ so that it’s always in a prominent place and easily seen by visitors to my page.
When you’ve completed these steps, visitors to your page will be invited to leave a review.
There is one catch.
If someone leaves a negative review, you can’t delete it. Only the reviewer can delete a review.
You can, however, report it and have it removed if you can show that it is not a fair review.
Having a bunch of positive reviews and interactions on your page is your best resource in that situation.
If it turns out that you don’t like the Reviews feature, or if it’s not working for you, you can simply disable the reviews by removing the Review tab, following a similar process to that used to add the tab in the first place.
Leaving Reviews.
Leaving a review is easy. You choose how many stars out of five, and leave a short comment. The minimum length is 40 characters. It can be as simple as “Your book covers are fantastic. I love the colours and design.” This would work perfectly well as a positive review.
This means that helping a small business or Indie author/musician/whatever by leaving a positive review could take as little as 30 seconds out of your day.
If you’ve read the book, heard the song, received a beautiful hand-made card or eaten a delicious meal at a restaurant, leaving a review is a great way to acknowledge the work that went into bringing you pleasure.
My Commitment.
I’m going to spend some time over the next weeks leaving reviews and ratings for the Facebook pages for authors and books I’ve been reading and appreciating lately.
I’m going to make this an ongoing thing. In conjunction with the reviews I write and post on Amazon, Goodreads and my Book Squirrel blog, I’m going to make a point of leaving a review on the author’s and/or the book’s Facebook page.
The Challenge:
It would be fantastic if you would do that for the writers and other Indies you know, too.
Not only will that brighten a writer’s day, it just might help them sell a book or two.
Following my previous post about how to use hashtags effectively, I thought it might be helpful to provide you with a list of hashtags that work well for Indie authors.
My aim in this post is not to give you every hashtag that writers use, but to provide you with a functional list of the most common, and therefore the most valuable.
Hashtags for connecting with other authors:
#AmWriting
#AmEditing
#WordCount
#WriterWednesday (or #WW)
#WritersLife
#PoetTues
#IndieAuthors
#NaNoWriMo
#WritingPrompt
#Creativity
#WIP (work in progress)
#WritersBlock
#WritingTips
#WriteTip
#WritersTellMe
IndieAuthorsBeSeen
Hashtags for identifying and connecting with other bloggers:
#blog
#blogger
#blogging
#bloggerswanted
#bloggersrequired
Hashtags for connecting by genre:
#Romance
#SciFi
#KidLit
#PNR (Paranormal Romance)
#MGLit (Middle Grade Lit)
#MemoirChat
#FlashFic
#Romance
#Horror
#FanFic
#YA
#History
#Poetry
Hashtags for connecting with publishing colleagues:
#GetPublished
#BookMarket
#BookMarketing
#PromoTip
#SelfPublishing
#SelfPub
#Publishing
#AskAgent
#AskAuthor
#AskEditor
#EBooks
#IndiePub (or #IndiePublishing)
#BookMarketing
#PubTip
Hashtags for connecting with readers:
#books
#bookworm
#FridayReads
#BookGiveaway
#MustRead
#ReadingList
#WorthReading
WhatToRead
#StoryFriday
#TeaserTues
#BookGiveaway
#free
#kindle
#nook
#iBooks
bookslover
bookspecials
bookpost
IndieBooks
IndieBooksBeSeen
Hashtags for Instagram only:
#writersofinstagram
#readersofinstagram
#poetsofinstagram
writerscommunity
#readers
Your own hashtag:
In addition to these, you can also make a hashtag for your own book or brand.
However, if you’re going to do this, make sure it’s unique to you or your book so that you don’t get lost in a haze of brand confusion.
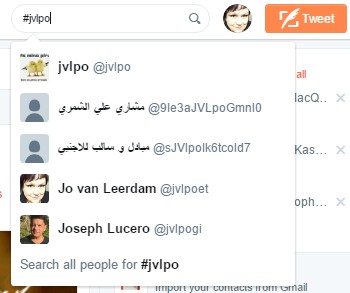
You can see here that #jvlpo was good, but not good enough.
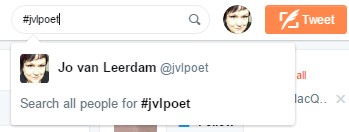
However, #jvlpoet was completely unique to me. I did this same search on both Twitter and Google when deciding on my domain name, jvlpoet.com.
Whether on Twitter or Facebook, or any other social media where you can pin a
post, you should. Frankly, I’m surprised
at how many people don’t.
Here’s why.
It is an immediate way for people to see what you’re about – your book, your favourite charity, an upcoming event, social justice issues, whatever it is.
It also serves as an easy way for people to share your posts and get your message out to even more people. Some of those people will share your interest, and either share your post or follow you. Some will do both.
In short, it’s a great way to get more attention with minimal effort.
If you have a good number of new followers on a regular basis, you can change your pinned post each week or each month to give followers and “click-throughs” something new to share on your behalf.
It’s also a great way to get feedback on the effectiveness of your post.
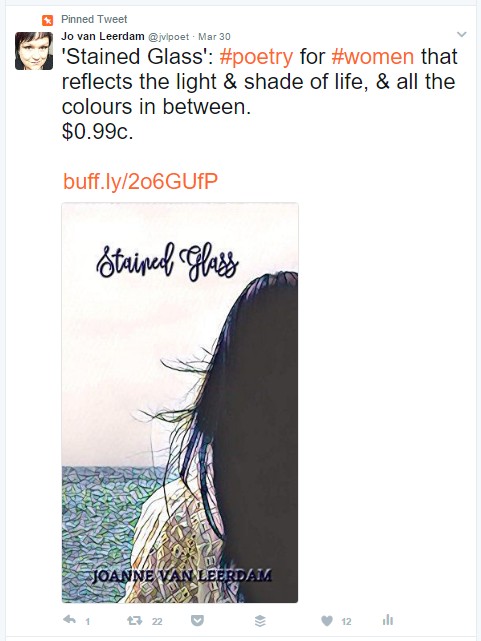
The stats at the bottom of a pinned tweet tell me how many replies, shares and likes that post has had. Clicking on the little graph icon at the far right gives you even more detail about how far your post has travelled.
It can get you more followers and more shares.
There’s another thing to consider, too. If people click through to your profile and all you have is shares or retweets, they can easily decide you don’t have original thoughts to share and lose interest. Given that they’ve been interested enough to click through to your profile, that’s probably a bunch of shares and prospective followers that you’ve missed out on.
To pin a post is easy.
On both Twitter profiles and Facebook pages, each post has a little down arrow at the top right-hand side. Click that, and choose “pin etc”.
That will remain your pinned post, and always appear at the top of your profile, until you choose to pin something else there.


 My aim in this post is not to give you every hashtag that writers use, but to provide you with a functional list of the most common, and therefore the most valuable.